
SSH MFA Setup
MFA Setup | Resetting MFA Token | SFTP via Bastion
The GRIT ssh bastion host is heimdall.grit.ucsb.edu / ssh.grit.ucsb.edu. It is set to force 'temporary one time pass', multi-factor authentication (TOTP MFA) via the google authenticator package. All ssh logins from non-campus IPs will be forced to enter a 6 digit TOTP MFA code in addition to your password. From campus IPs only ssh key authentication is permitted. Instructions for using either the Google Authenticator App or the DUO App are below.
MFA Setup
The first ssh log in to heimdall will prompt the user to setup a TOTP MFA app.
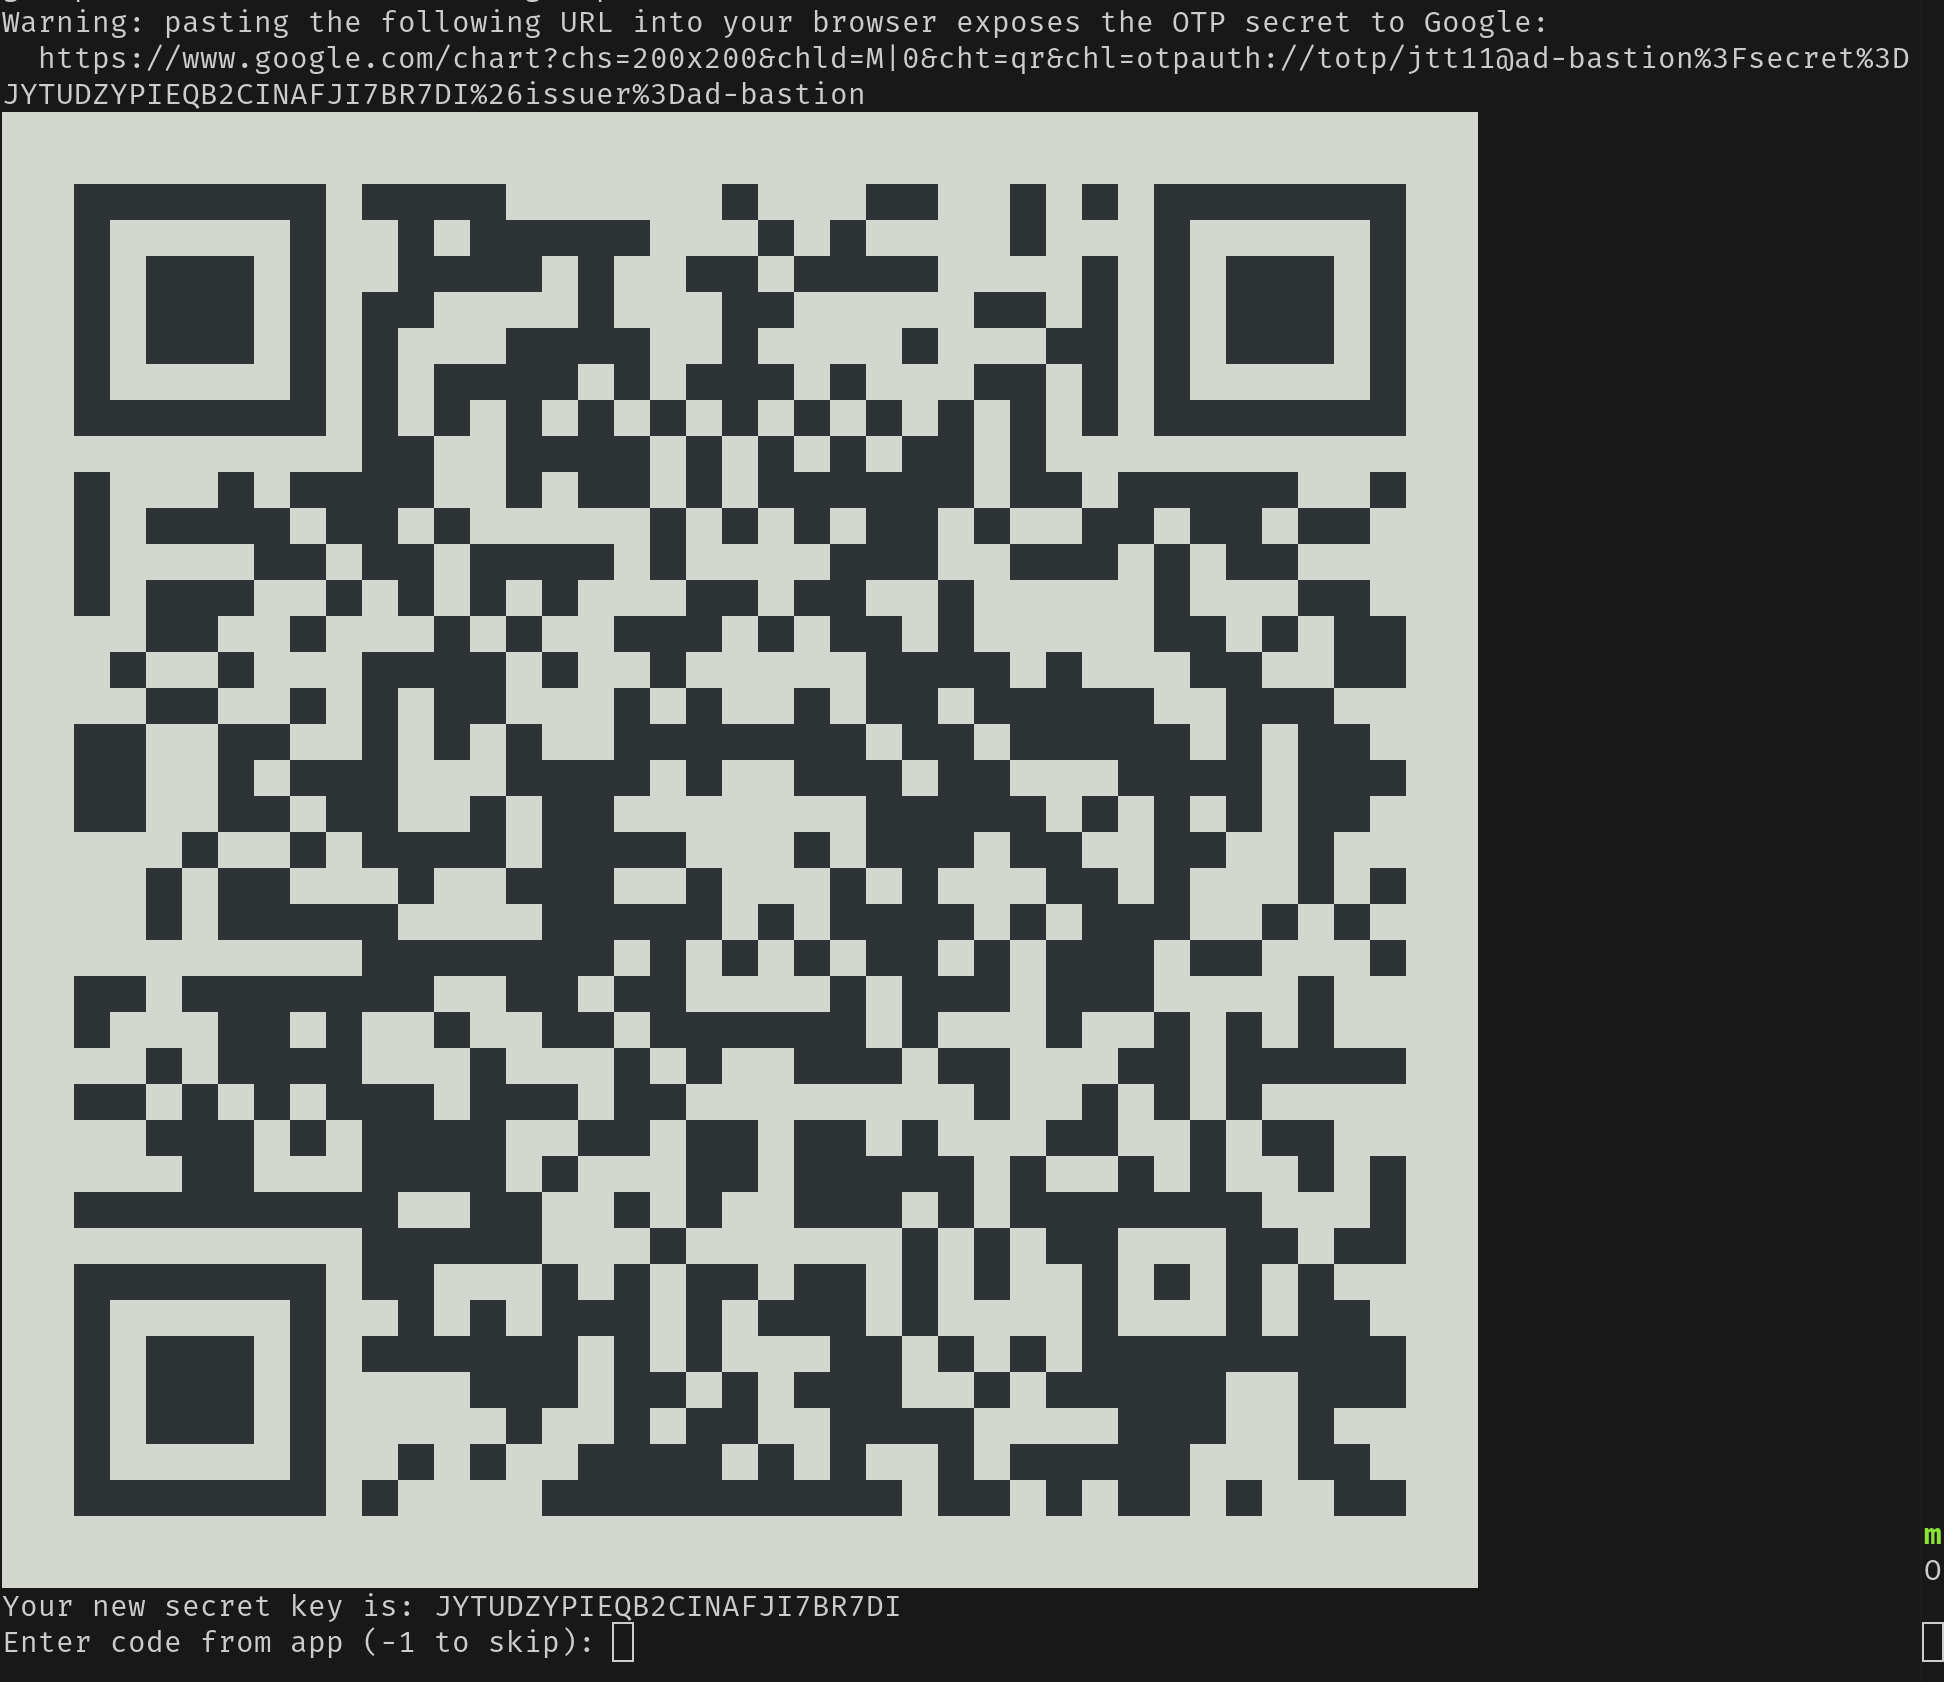
Using the Google Authenticator App:
-
select the + button in the bottom right
-
select scan a QR code or if the phone does not have a camera select enter a setup key and enter the secret key below the QR code
-
enter the 6 digit code generated by the app
Using the DUO App:
-
Select +Add in the top right
-
select Use QR code
-
scan the QR code generated by the terminal session
-
select next in the app
-
select next in the app and enter an account name
-
if prompted select the option to enable backup
-
enter a password and select next
-
enter next again
-
enter the 6 digit code generated by the app in the terminal session
-
copy the 5 emergency codes generated to a secure accessible location like nextcloud or google drive
Using The Same Token For SSH and SSO
1. create a new token in authentik (in web ui settings cog in the top right -> MFA Devices -> enroll drop down -> select totp).
2. select copy TOTP config and paste in a text editor.
3. select everything between secret= and the & sign (example below, do not use this it won't work)
secret=5POEBWJOJ6OCHJ6MTN5NHAAT4FL6SUPERSECURE!&.4. make your .gogole_authenticator config writeable and replace the top line with the string from above.
 mbales@ssh-bastion:~$ ls -alh .google_authenticator
-r-------- 1 mbales grit admins 135 Apr  6 19:57 .google_authenticator
mbales@ssh-bastion:~$ chmod 600 .google_authenticator
mbales@ssh-bastion:~$ ls -alh .google_authenticator
-rw------- 1 mbales grit admins 135 Apr  6 19:57 .google_authenticator
mbales@ssh-bastion:~$ vi .google_authenticator
should look like this:
5POEBWJOJ6OCHJ6MTN5NHAAT4FL6peepee
" RATE_LIMIT 3 30 1775532845
" WINDOW_SIZE 3
" DISALLOW_REUSE 59184428
" TOTP_AUTH
95855787
39208252
98626801
32791235
26108983
then set the .google_auth to read only:
mbales@ssh-bastion:~$ chmod 400 .google_authenticator
mbales@ssh-bastion:~$ ls -alh .google_authenticator
-r-------- 1 mbales grit admins 141 Apr  6 20:01 .google_authenticator
Resetting an MFA token
From a Campus IP
If the user is able to come in via a campus IP or VPN then they can login with just their AD username and password or ssh key:
-
log in to the account and run
google-authenticator-
select Y to enable time-based tokens
-
follow the MFA setup steps from the section above
Without User Login
If the user is unable to log in from a campus IP or VPN:
-
ssh into heimdall as a user with sudo privilidges
-
navigate to the user's home directory
- ls -alh (to show hidden files - All, List, Human readable)
-
delete the .google_authenticator file
-
have the user log in and setup their MFA following the steps above
SFTP via Bastion
MacOS
Open up a terminal window and enter the following command
ssh -L 3311:<hostname.fqdn.com>:22 <username>@ssh.grit.ucsb.edu
when prompted enter your domain credentials and dual factor code open your preferred file transfer utility and enter localhost as the server and port 3311, then use your domain credentials as normal.
Windows 10+
Open a PowerShell window and enter the following command
ssh -L 3311:<hostname.fqdn.com>:22 <username>@ssh.grit.ucsb.edu
when prompted enter your domain credentials and dual factor code open your preferred file transfer utility and enter localhost as the server and port 3311, then use your domain credentials as normal.
Linux
Open up a terminal window and enter the following command
ssh -L 3311:<hostname.fqdn.com>:22 <username>@ssh.grit.ucsb.edu
when prompted enter your domain credentials and dual factor code open your preferred file transfer utility and enter localhost as the server and port 3311, then use your domain credentials as normal.
Filezilla

Advanced SSH Tunnels
To tunnel multiple ports you can repeat the -L port:host:port command. Here is an example that tunnels local port 8080, 3306, and 5432:
ssh -L 8080:localhost:8080 -L 3306:localhost:3306 -L 5432:localhost:5432 user@remote-server.comIf you need to make make ports on your local system available to the remote network you can use a reverse SSH tunnel:
ssh -R 8080:localhost:8080 -R 3306:localhost:3306 -R 5432:localhost:5432 user@remote-server.comIf you need to tunnel ports dynamically a SOCKS proxy may be used:
ssh -D 1080 user@remote-server.com