
Set up Dynamic DNS
Use case: DynamicDNS allows us to allow certain traffic through to GRIT hosted servers where static public IP addresses are not available, or for field researchers that rely on mobile hotspots, or local internet connections while out in the field.
The instructions below use No-IP Dynamic DNS.
First you will need to create an account at https://www.noip.com/sign-up
Since this is going to be used for accessing GRIT data, we also strongly recommend setting up 2-Factor Authentication on your No-IP account before proceeding.
To enable 2FA, click on Account > Security
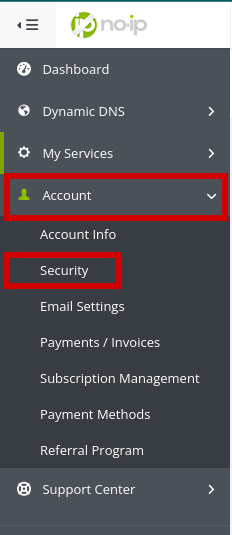
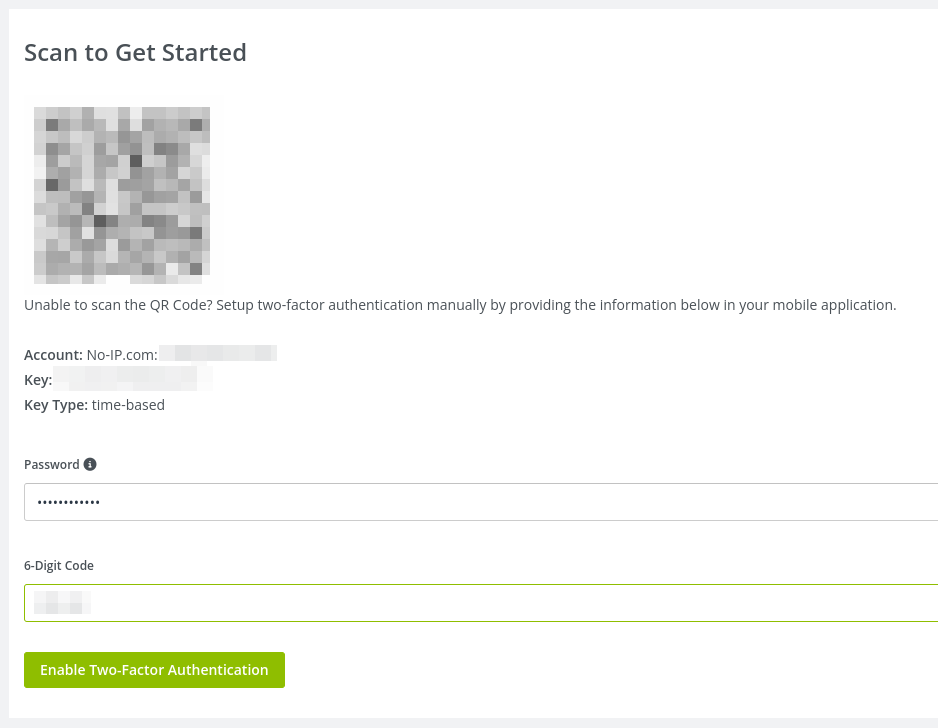
Scan the QR code shown on this page, and follow the instructions shown to complete the 2FA setup.
Creating a DynamicDNS address (Windows and Mac)
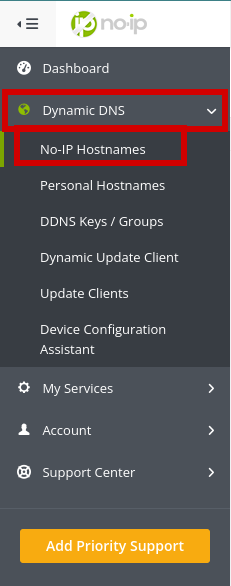
- From the main menu, select Dynamic DNS then click on No-IP hostnames

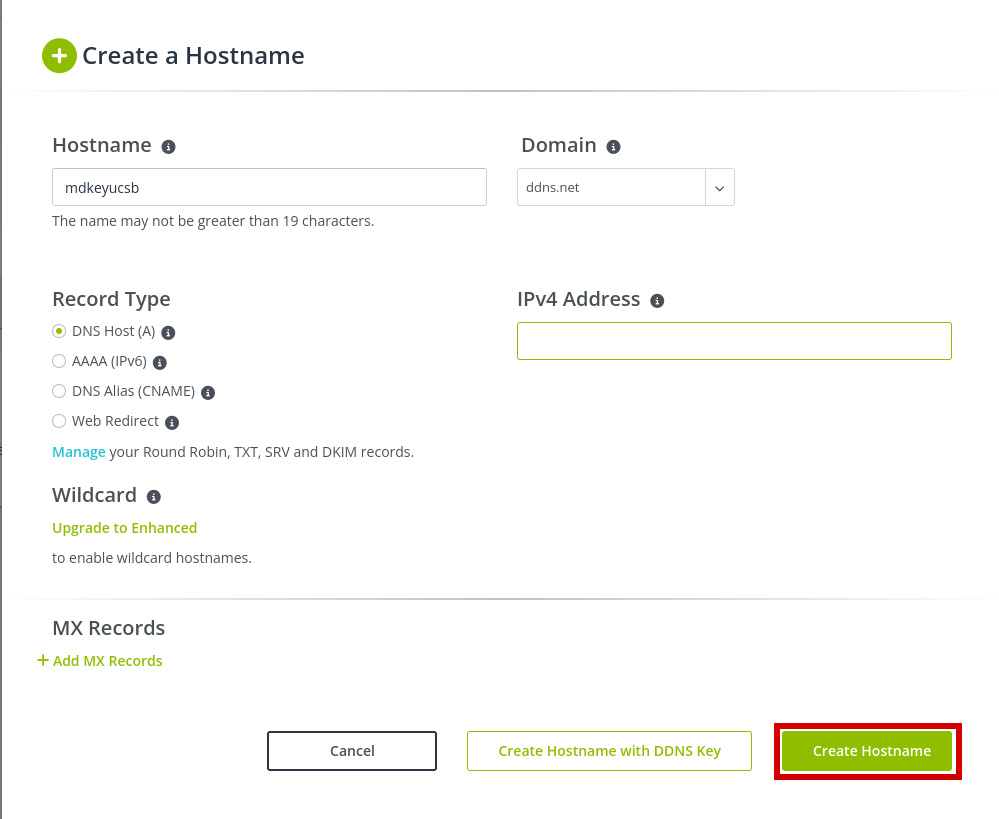
- Under Hostname, enter a descriptive name, and select ddns.net as your domain then click on Create Hostname

- Next you will download the No-IP Dynamic Update client (DUC) by clicking on Dynamic Update Client from the same Dynamic DNS menu.
- Download the client that matches your OS
- Once DUC is installed, launch the app, and sign into your No-IP account
Creating a DynamicDNS address (Linux)
- From the main menu, select Dynamic DNS then click on No-IP hostnames
- Under Hostname, enter a descriptive name, and select ddns.net as your domain then click on Create Hostname with DDNS Key

- Click Generate DDNS Key
- Copy down your username, and password
Your password will only be shown to you this one time
- Click Continue to complete the hostname setup.
- Follow the instructions here to install the latest version of the Linux DUC application (CLI only)
- Once completed, run noip-duc from your command line:
noip-duc -g all.ddnskey.com --username <DDNS key username> --password <DDNS key password>You should see something like this:
[2024-06-04T21:15:11Z INFO  noip_duc] Starting update loop
[2024-06-04T21:15:11Z INFO  noip_duc::public_ip] Attempting to get IP with method Dns(No-IP Anycast DNS Tools)
[2024-06-04T21:15:11Z INFO  noip_duc] got new ip; ip=[your WAN IP], last_ip=0.0.0.0
[2024-06-04T21:15:12Z INFO  noip_duc] update succeeded; ip=[your WAN IP], changed=false
[2024-06-04T21:15:12Z INFO  noip_duc] checking ip again in 5m

After the above, confirm that No-IP shows your current WAN IP (you can validate against the results from https://myip.grit.ucsb.edu)