Mounting SMB Storage
Windows 10/11
- Open Windows File Explorer
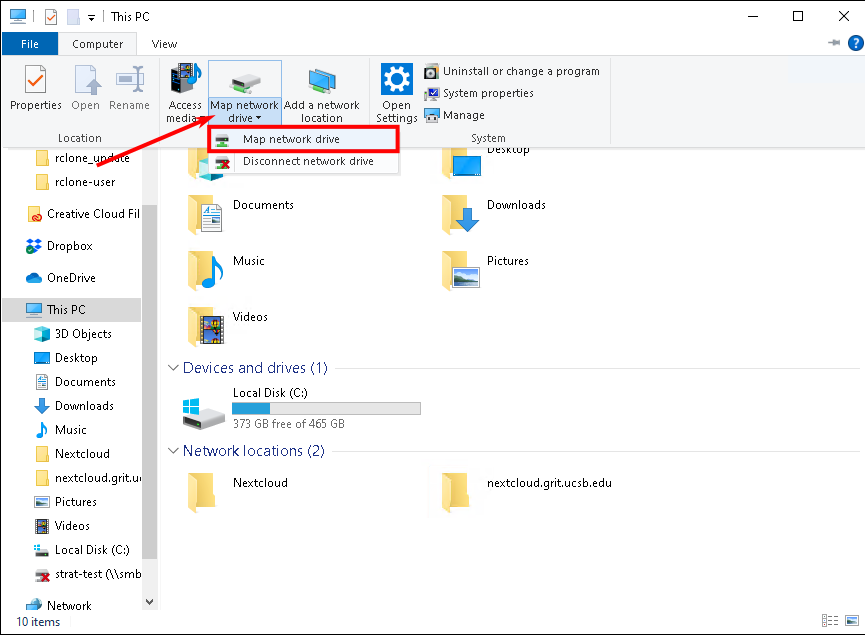
- Select This PC, then click the Computer Menu Tab
- Select the Map a network drive drop-down, then Map network drive

- From the Drive: drop-down, select the drive letter you wish to map this network storage to
- In the Folder: field enter the path to your SMB storage IE \\smb.grit.ucsb.edu\<username or foldername>
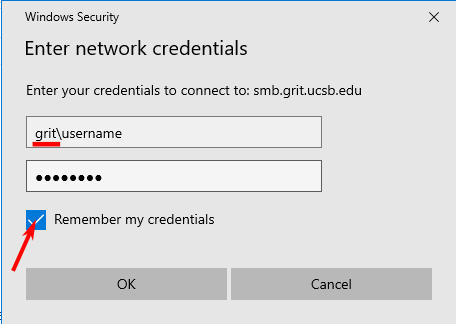
- Check the box for Connect using different credentials

- In the next window, enter your GRIT AD username and password.
- Be sure to prepend your username with grit\
- Check the box to Remember my credentials and click OK


MacOS
- From the Finder menu, click Go.
- Click Connect to Server from Go’s drop down menu.
- Alternatively, you can also press Command+K to launch Connect to Server.

-
Connect to a SMB Share
- In the Server Address field, enter smb:// to define the network protocol for SMB, and then enter either the IP address or the hostname of the server.
The path below is just an example - if you have a specific path to connect to, whether it be shared storage, or your personal storage - check with GRIT support to confirm your SMB path. The example below does not actually exist. 
- To add the server to your Favorite Servers list, click the ‘+’ button.
- Click Connect to connect to the share.
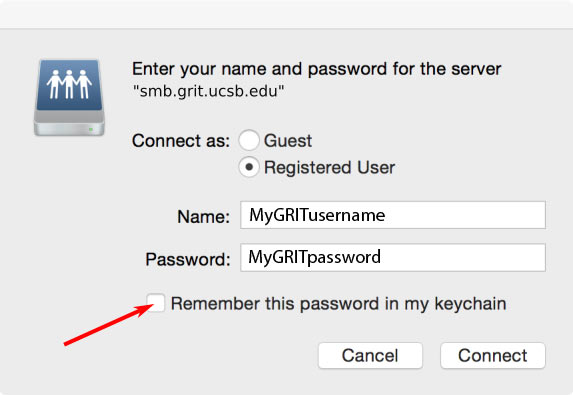
- When prompted, enter your NetID user name and password to connect to server.
-
Check the box to Remember this password in my keychain

-
- In the Server Address field, enter smb:// to define the network protocol for SMB, and then enter either the IP address or the hostname of the server.