Mounting SMB Storage

Windows 10/11

  1. Open Windows File Explorer
  2. Select This PC, then click the Computer Menu Tab
  3. Select the Map a network drive drop-down, then Map network drive
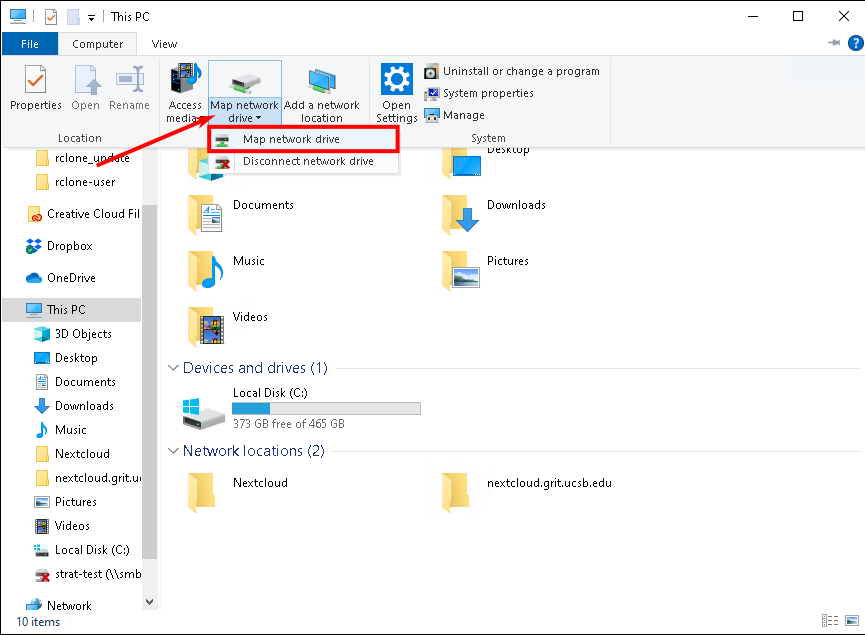
    windowsSMB1.png

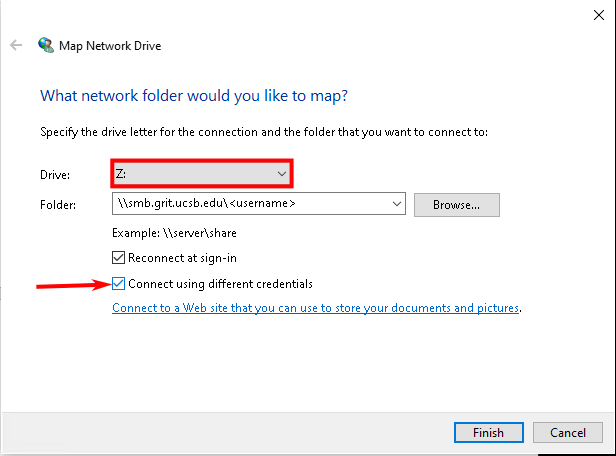
  4. From the Drive: drop-down, select the drive letter you wish to map this network storage to
    • In the Folder: field enter the path to your SMB storage IE \\smb.grit.ucsb.edu\<username or foldername>
    • Check the box for Connect using different credentialswindowsSMB2.png
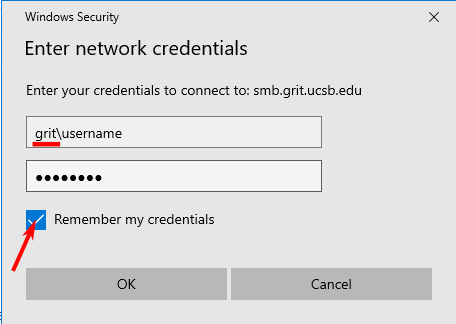
  5. In the next window, enter your GRIT AD username and password.
    • Be sure to prepend your username with grit\
    • Check the box to Remember my credentials and click OKwindowsSMB3.png


MacOS

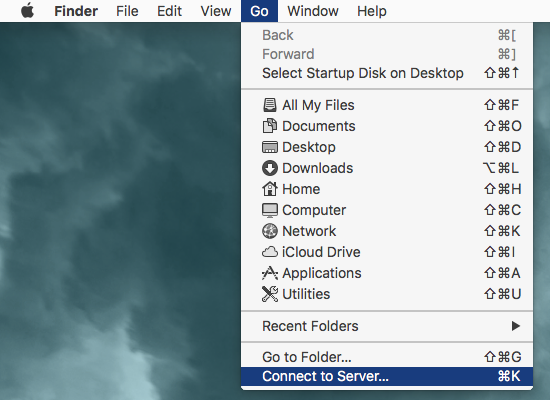
  1. From the Finder menu, click Go.
  2. Click Connect to Server from Go’s drop down menu.
  3. Alternatively, you can also press Command+K to launch Connect to Server.
    OSX Finder - Connect to Server
  4. Connect to a SMB Share

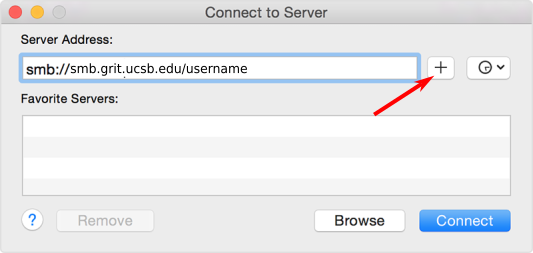
    1. In the Server Address field, enter smb:// to define the network protocol for SMB, and then enter either the IP address or the hostname of the server. 

      The path below is just an example - if you have a specific path to connect to, whether it be shared storage, or your personal storage - check with GRIT support to confirm your SMB path. The example below does not actually exist. 
      macSMB2.png
    2. To add the server to your Favorite Servers list, click the ‘+’ button.
    3. Click Connect to connect to the share.
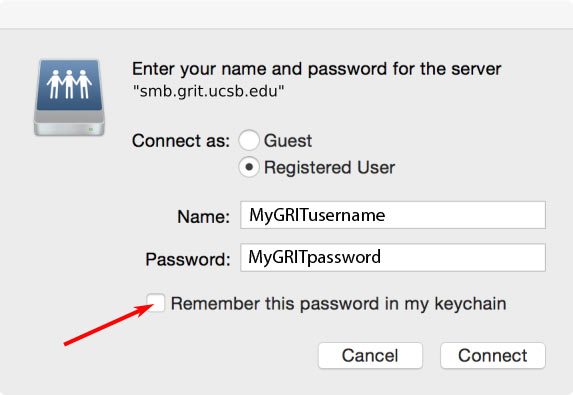
    4. When prompted, enter your NetID user name and password to connect to server.
      • Check the box to Remember this password in my keychain

        macsmb3.1.jpg