Adding a Printer Mac
Add a network printer by specifying its IP address
You must know the network printer’s IP address or host name, printing protocol, and model number or printer software name. If it uses a special queue, you also need to know the queue name. Here's a list https://bookstack.grit.ucsb.edu/books/printers/chapter/printers-by-department
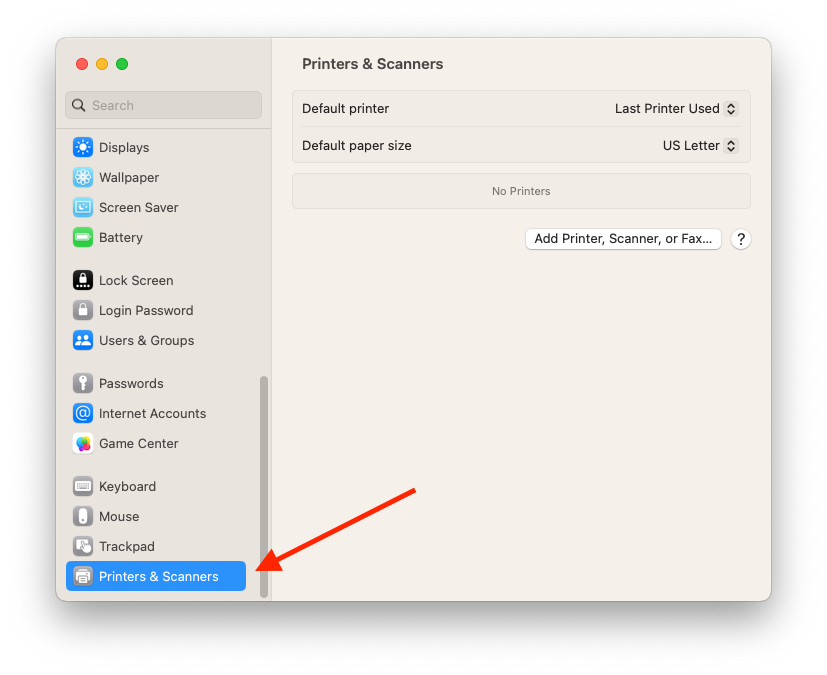
- Click on System Preferences
- In the sidebar, scroll down and choose Printers & Scanners
- Select Add Printer, Scanner or Fax (in some older operating systems you will not see the Add printer, if so, locate and click on the + symbol to add a printer)
-
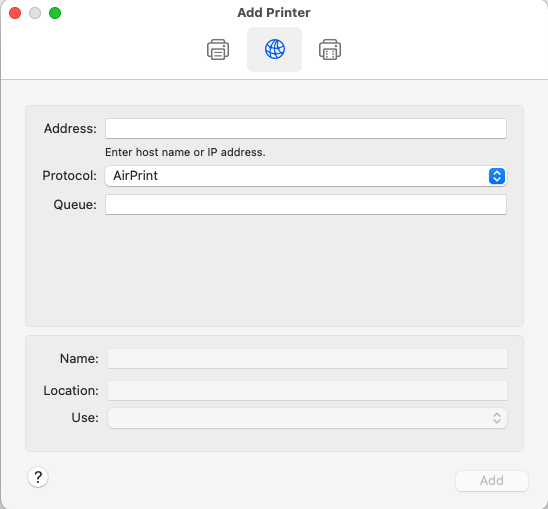
Click the image of the Globe to add the printer by IP. Then make sure to select the protocol Aiprint

- In the Address field, enter the hostname of the printer

- When it says "Use: Generic Postscript Driver" just keep whatever default settings it automatically selected. You may then choose to change the Name or Location for the printer to help you remember it.
- Click Add.
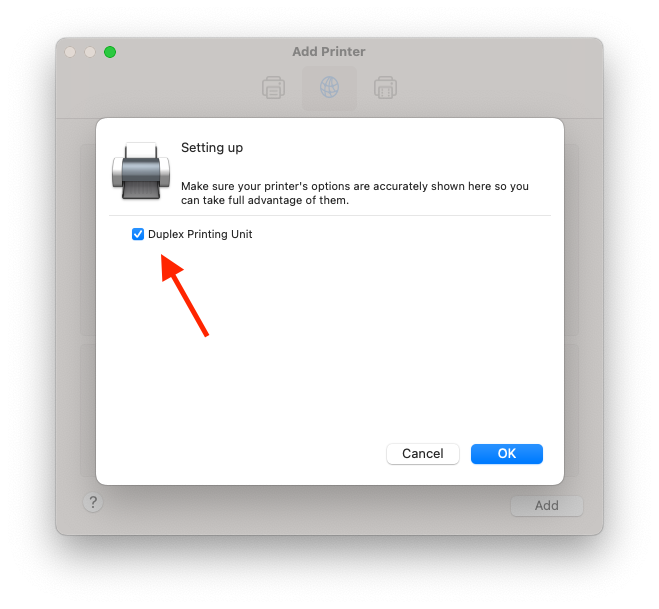
- Select "Duplex Printing Unity" if you are setting up a printer that has the ability to print double sided (most printers do!) That's it! Congratulation, you've added the printer and can now print to it.


