
Jupyter Notebook
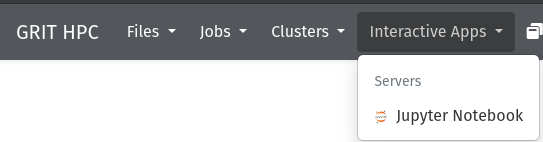
To launch a Jupyter Notebook select Interactive apps from the top menu bar and select Jupyter Notebook from the dropdown.
Once in the Jupyter Notebook spawner page you will need to fill in the following fields:
- Account: your GRIT account name (generally the same as your netID)
- Partition: grit_nodes is the default
- Job Duration: set a number of hours for your Jupyter Notebook to run, after this expires your job will be stopped.
ResourceCPUs:Profile:setselectthehownumbermanyofresourcesCPUyourcoresJupyter Notebool willto beallotted.allottedYourfornotebookthiswilltask, with a maximum of 24. (this maximum is selected so as to not consume 100% of the cores on any of the HPC systems in the GRIT stack)- RAM: set the amount of RAM in gigabytes available to this task, with a maximum of 256GB. (this maximum is selected so as to not consume 100% of the RAM on any of the HPC systems in the GRIT stack)
- Job Name: this field is optional and may be
unableused toconsumedifferentiatemoretasksthanif multiple are running under theselectedsameresourcesaccount.
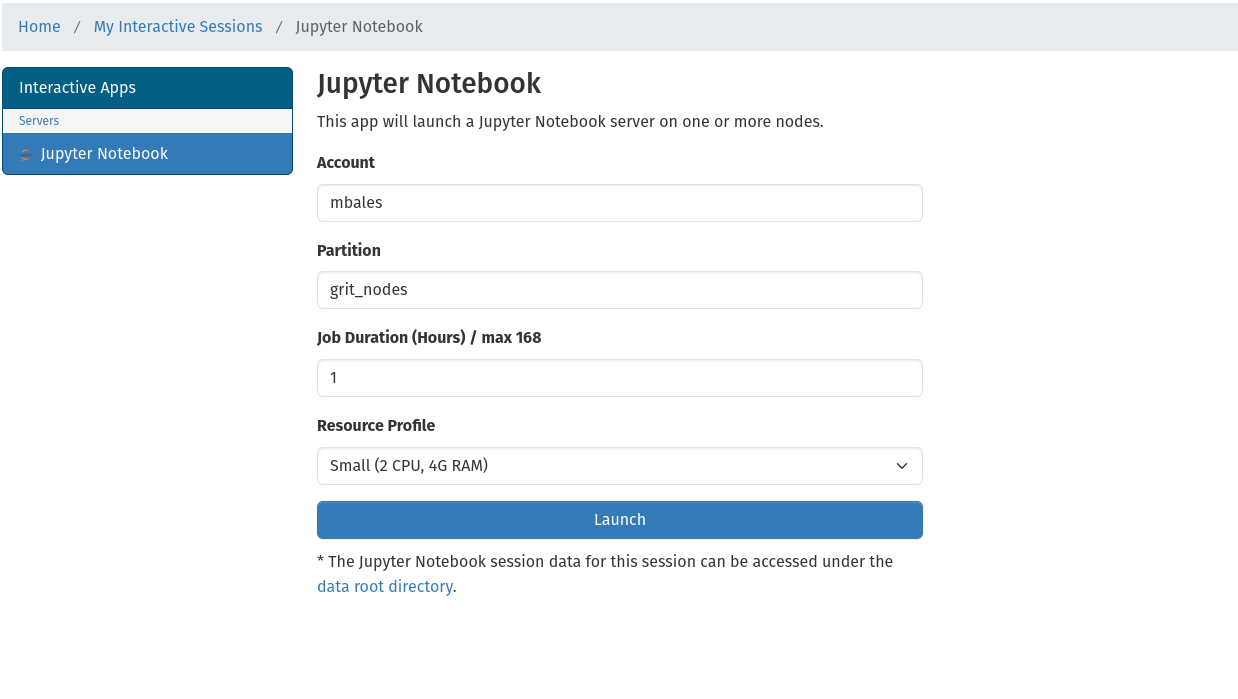
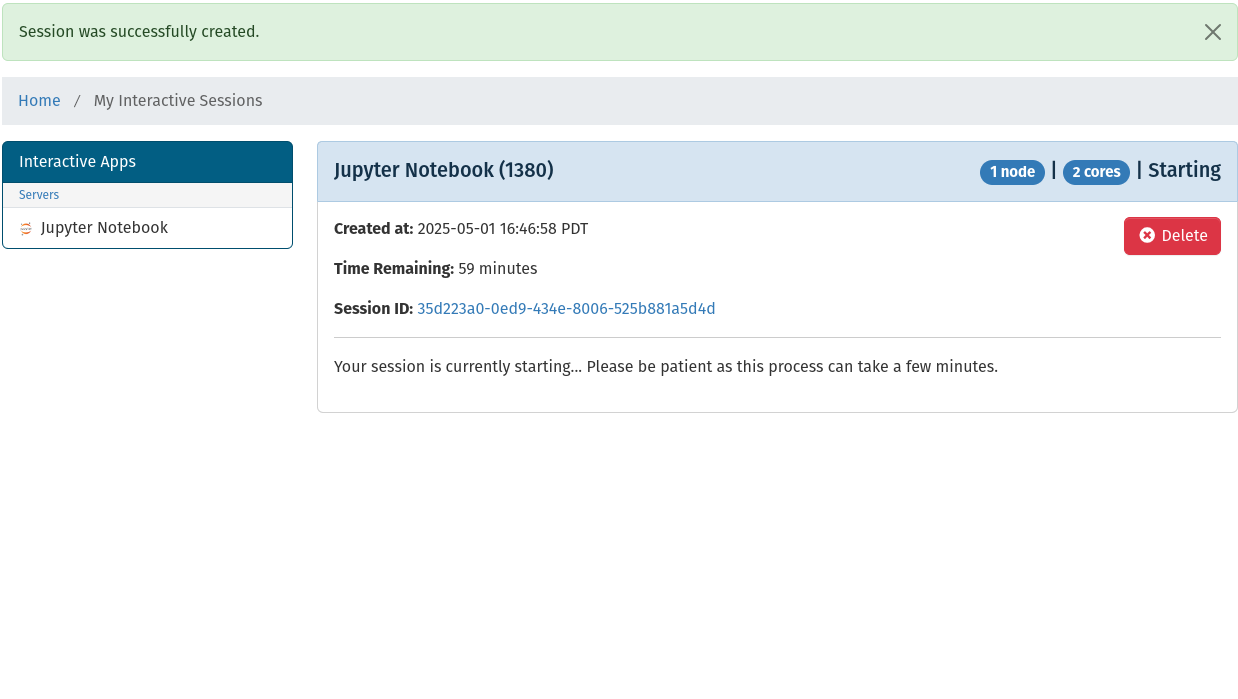
Once those fields are completed select the launch button. This will return you to the My Interactive Sessions page and show the currently spawned job as well as any past jobs that have been completed. It will take a few seconds for the job to launch as long as there is available resources on an HPC host. If there are not enough free resources on any host the job will time out after 1 minute:
If the job spawns successfully the session window will update with a Connect to Jupyter button, a host button, and a delete button:
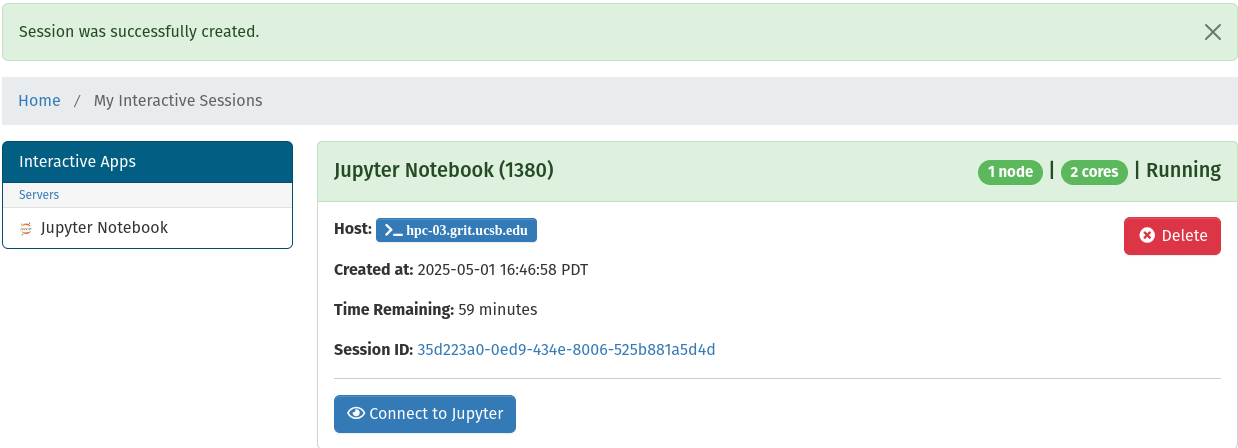
- The Connect to Jupyter button will take you to your Jupyter Notebook
- The Host button will take you to a terminal session on the HPC host your job is running on
- The Delete button will immediately close your Jupyter Notebook session